A highly effective buggy all-rounder for use during spring hatches of olive flies on lake or river
Before a hatch starts, a nymph can be very effective. This pattern uses a goose biot body to create lifelike segmentation.
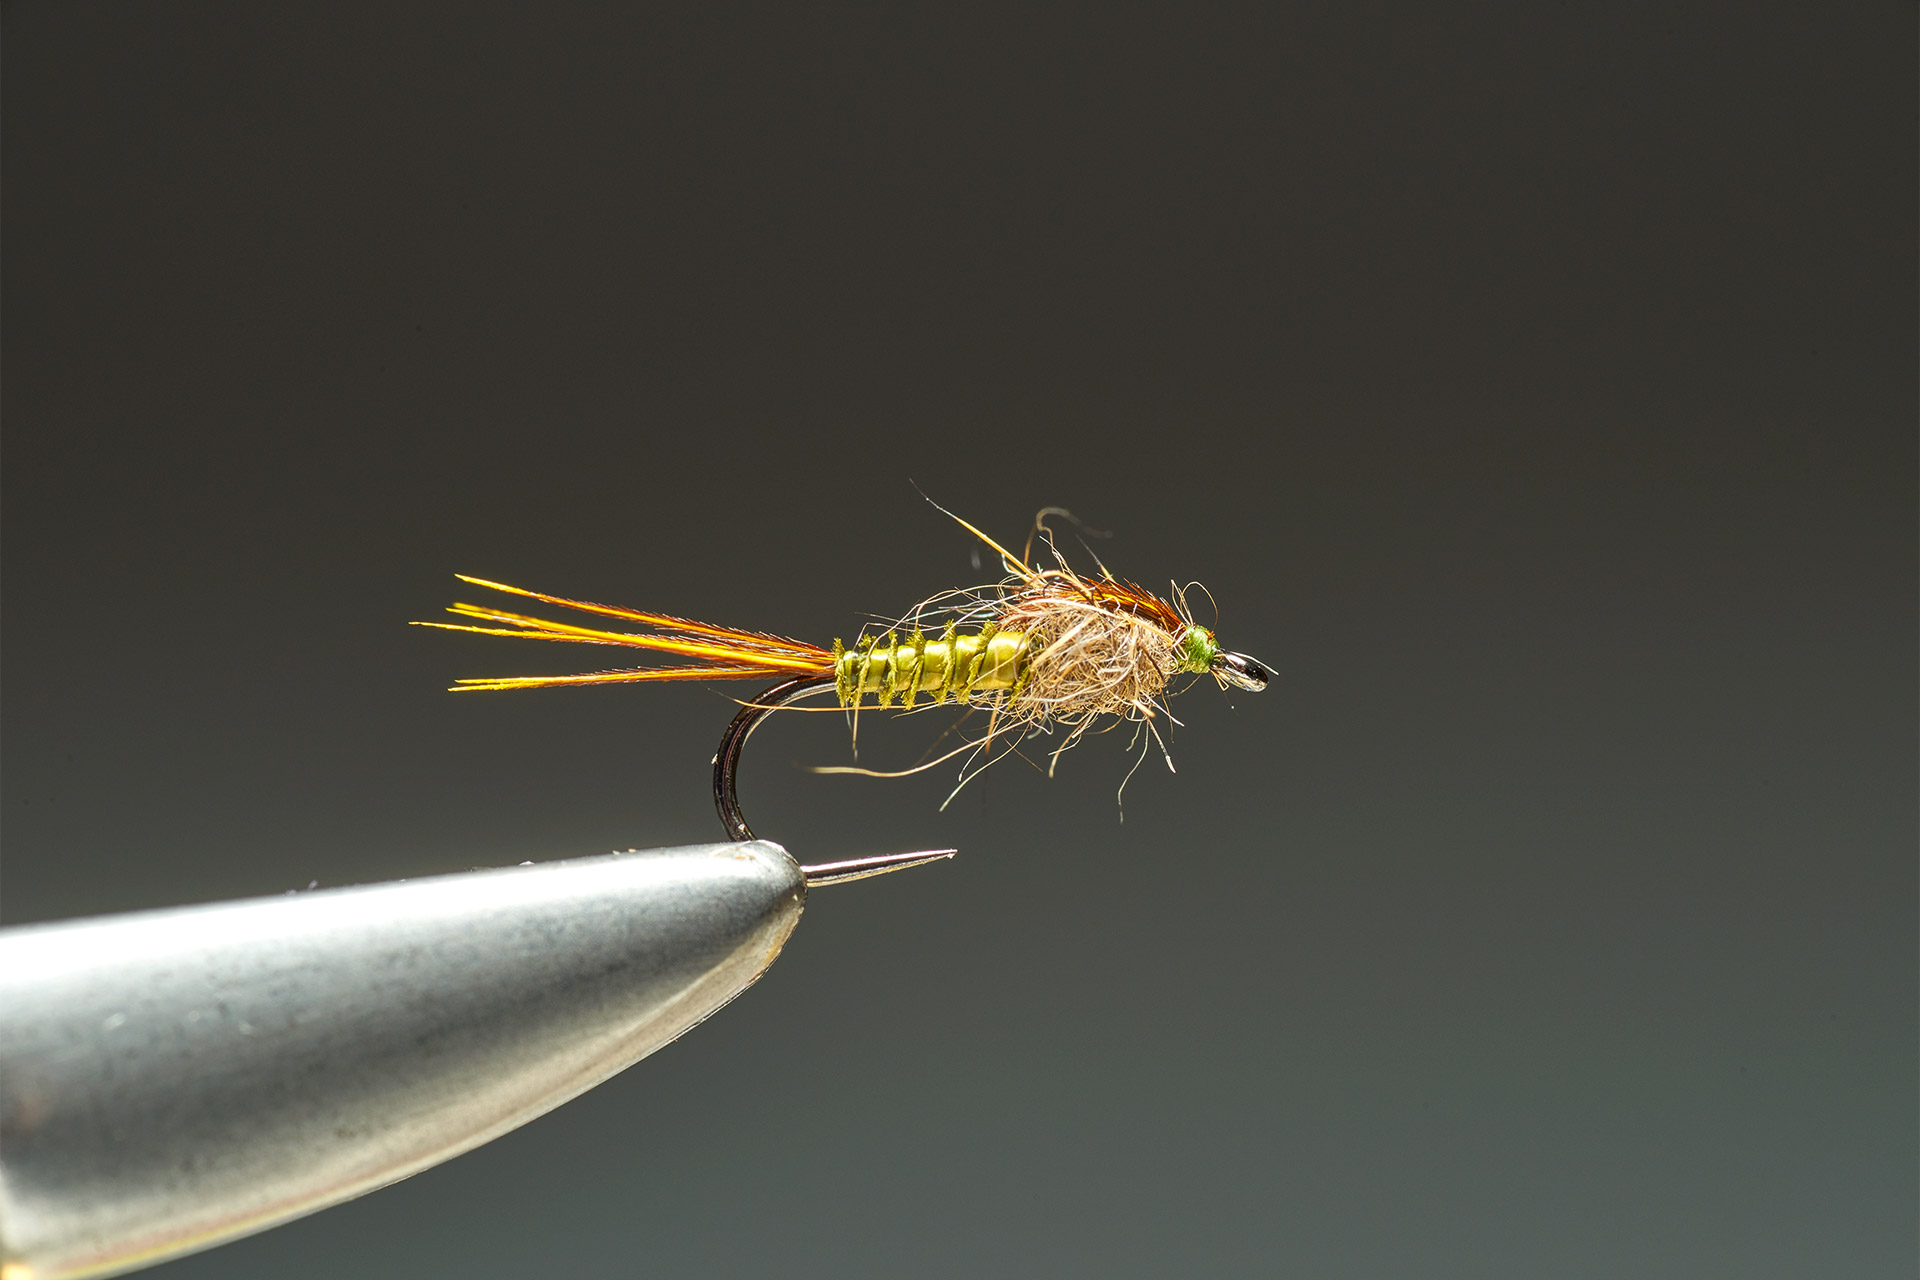
Materials for the Olive Biot Nymph
Hook: Size 14 Partridge PH-SUD Patriot Ideal Dry
Thread: Olive Sheer 14/0 or similar Tail: Olive-dyed cock pheasant tail fibres
Body: One olive-dyed goose biot Thorax: Natural hare, including guard hairs
Thorax cover: Olive-dyed cock pheasant tail fibres
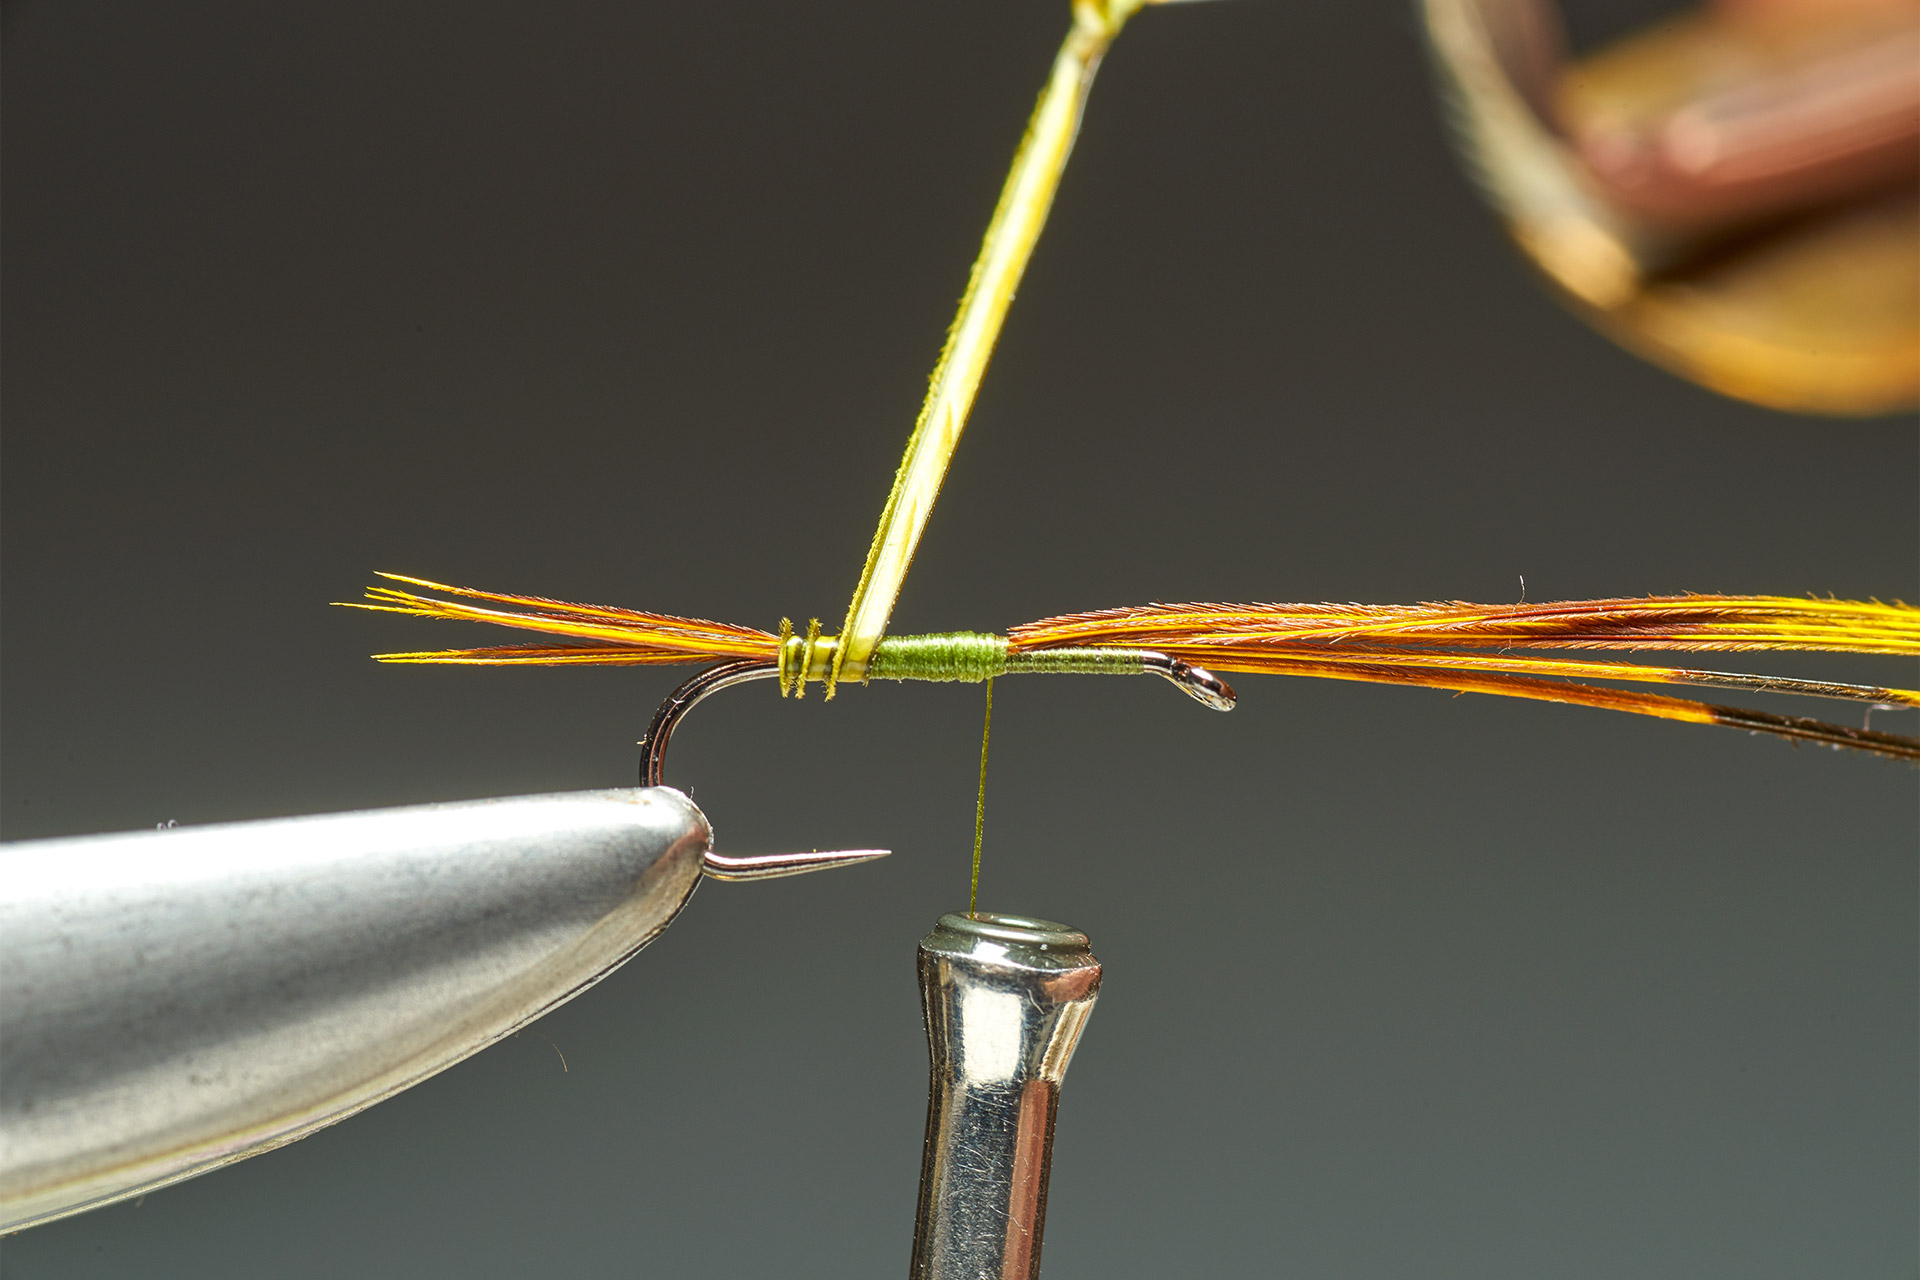
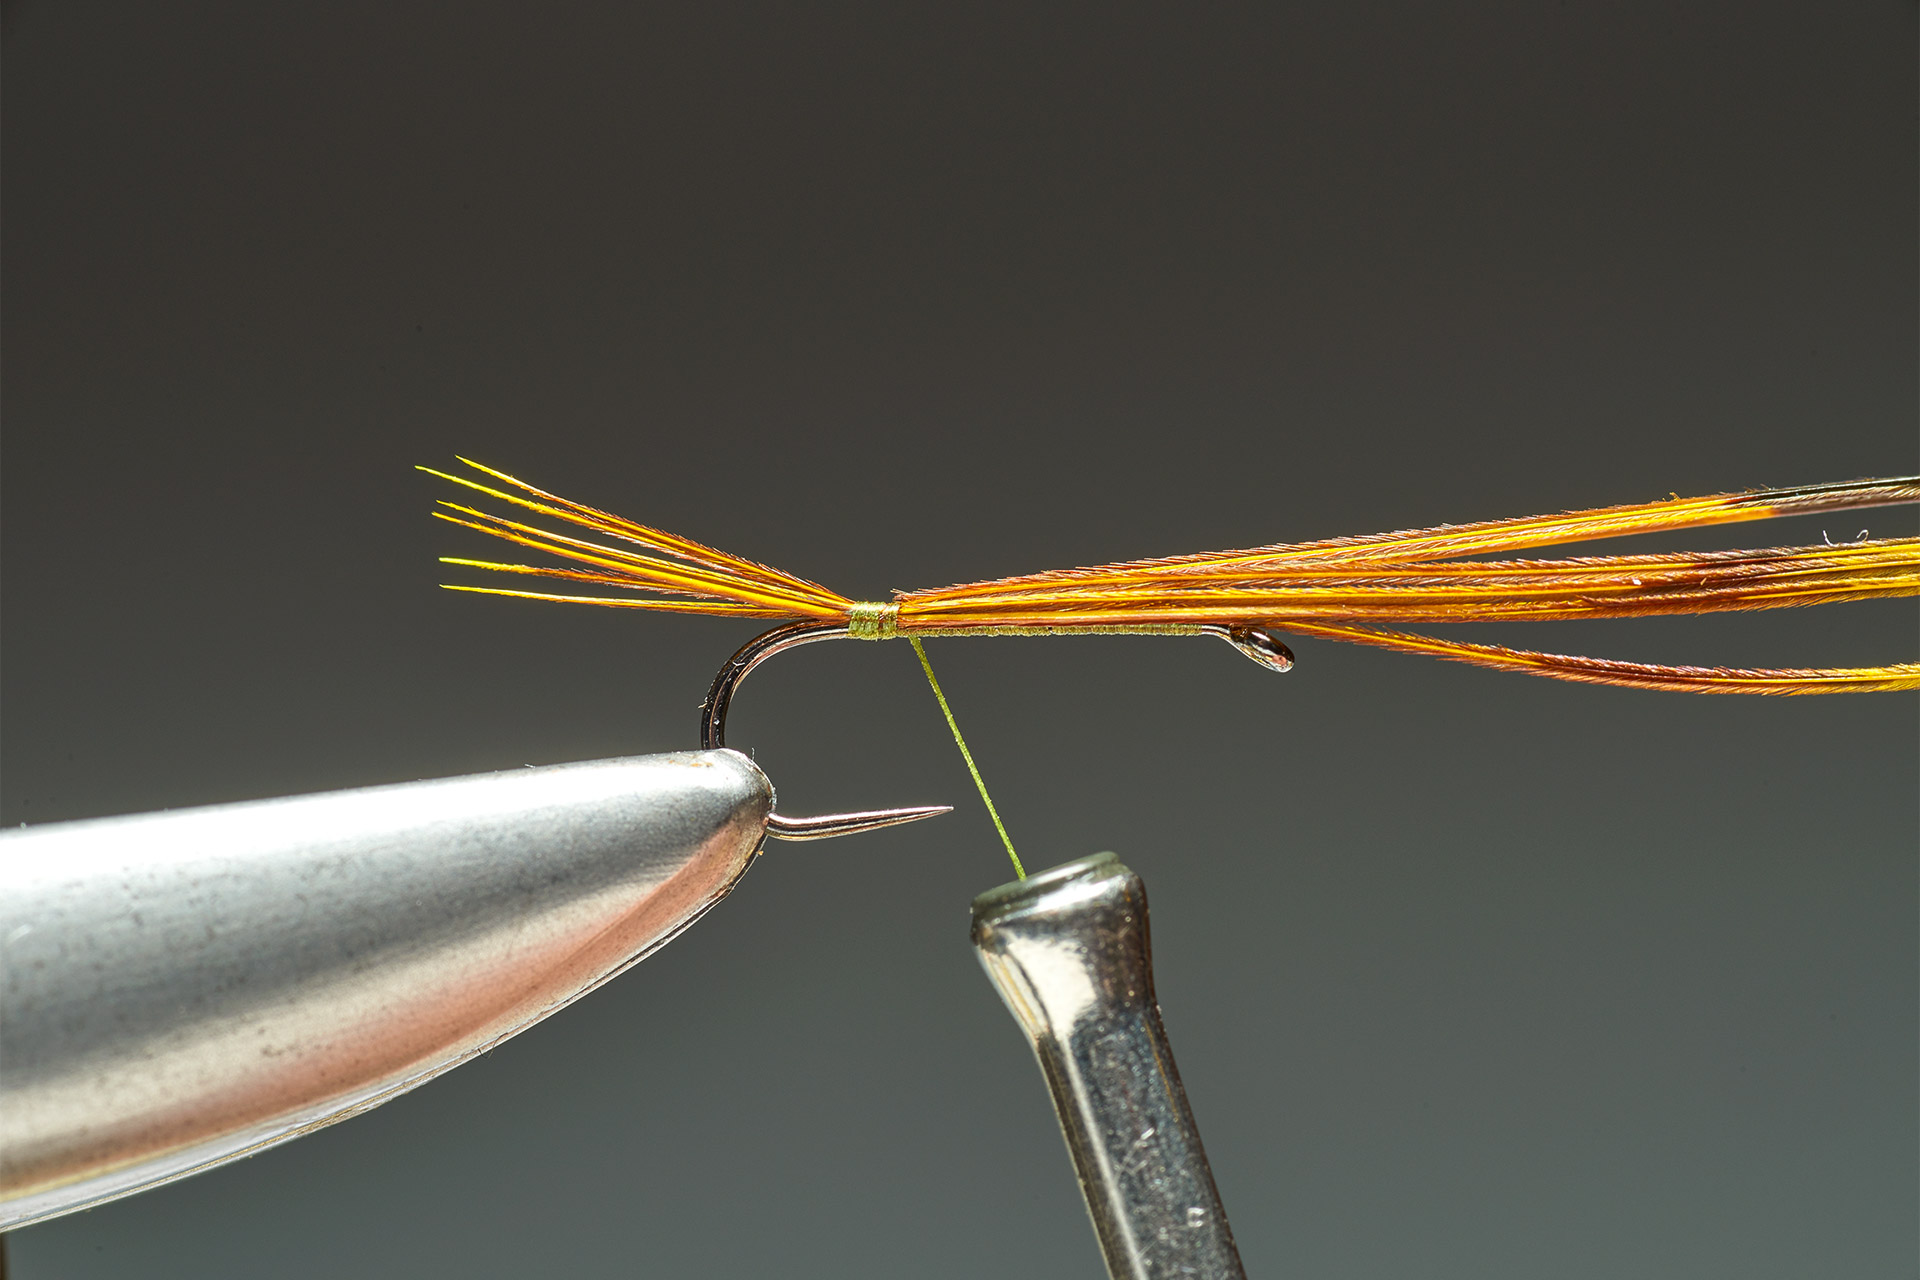 Step 1. Run the thread in touching turns to the hook-bend. Catch in six pheasant tail fibres on top of the shank so the tips form a short tail.
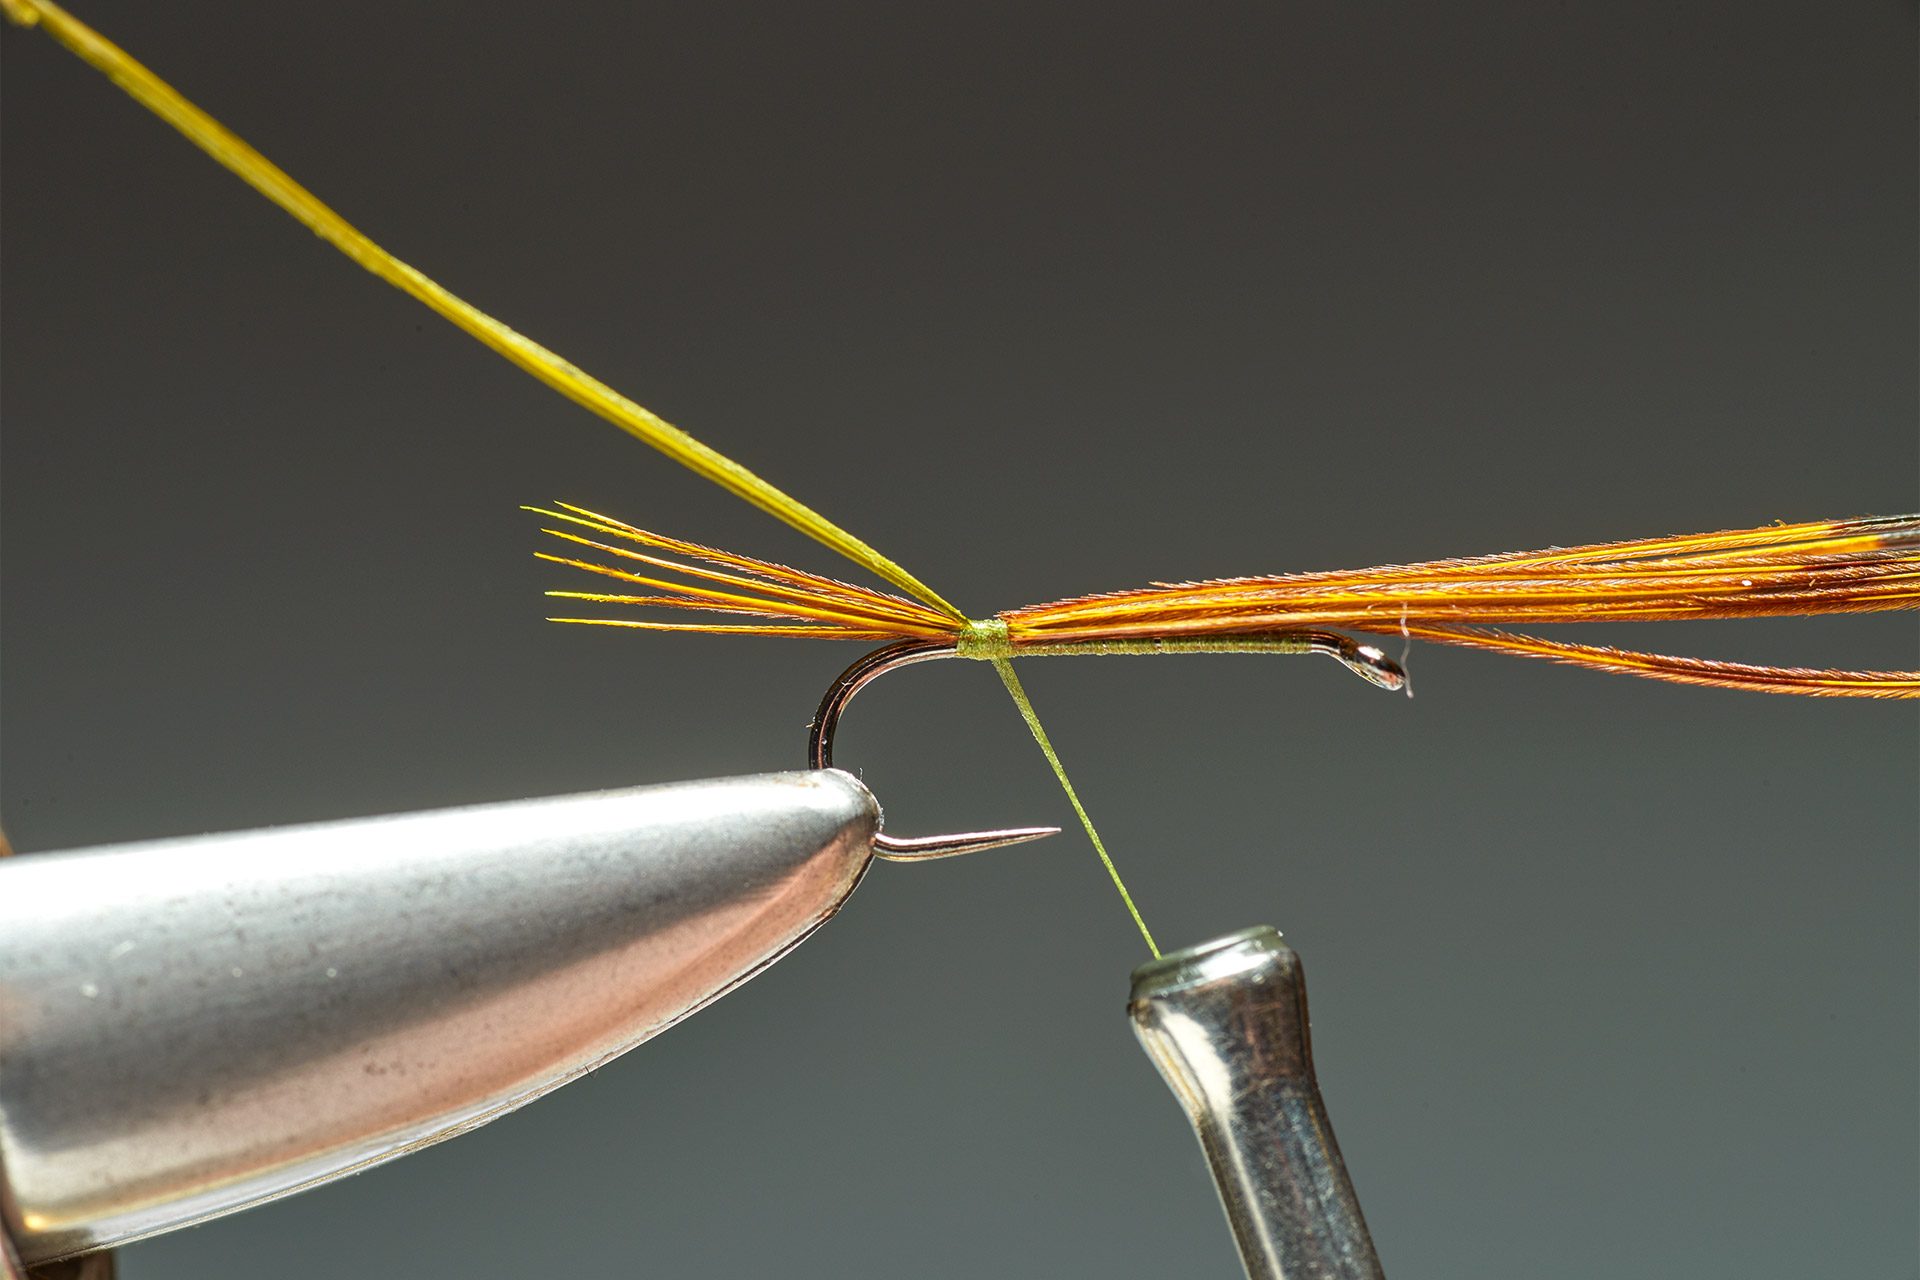 Step 2. Select a single biot and catch it in at the tail-base by the minimum amount of its tip. Ensure that the biot curves slightly upwards.
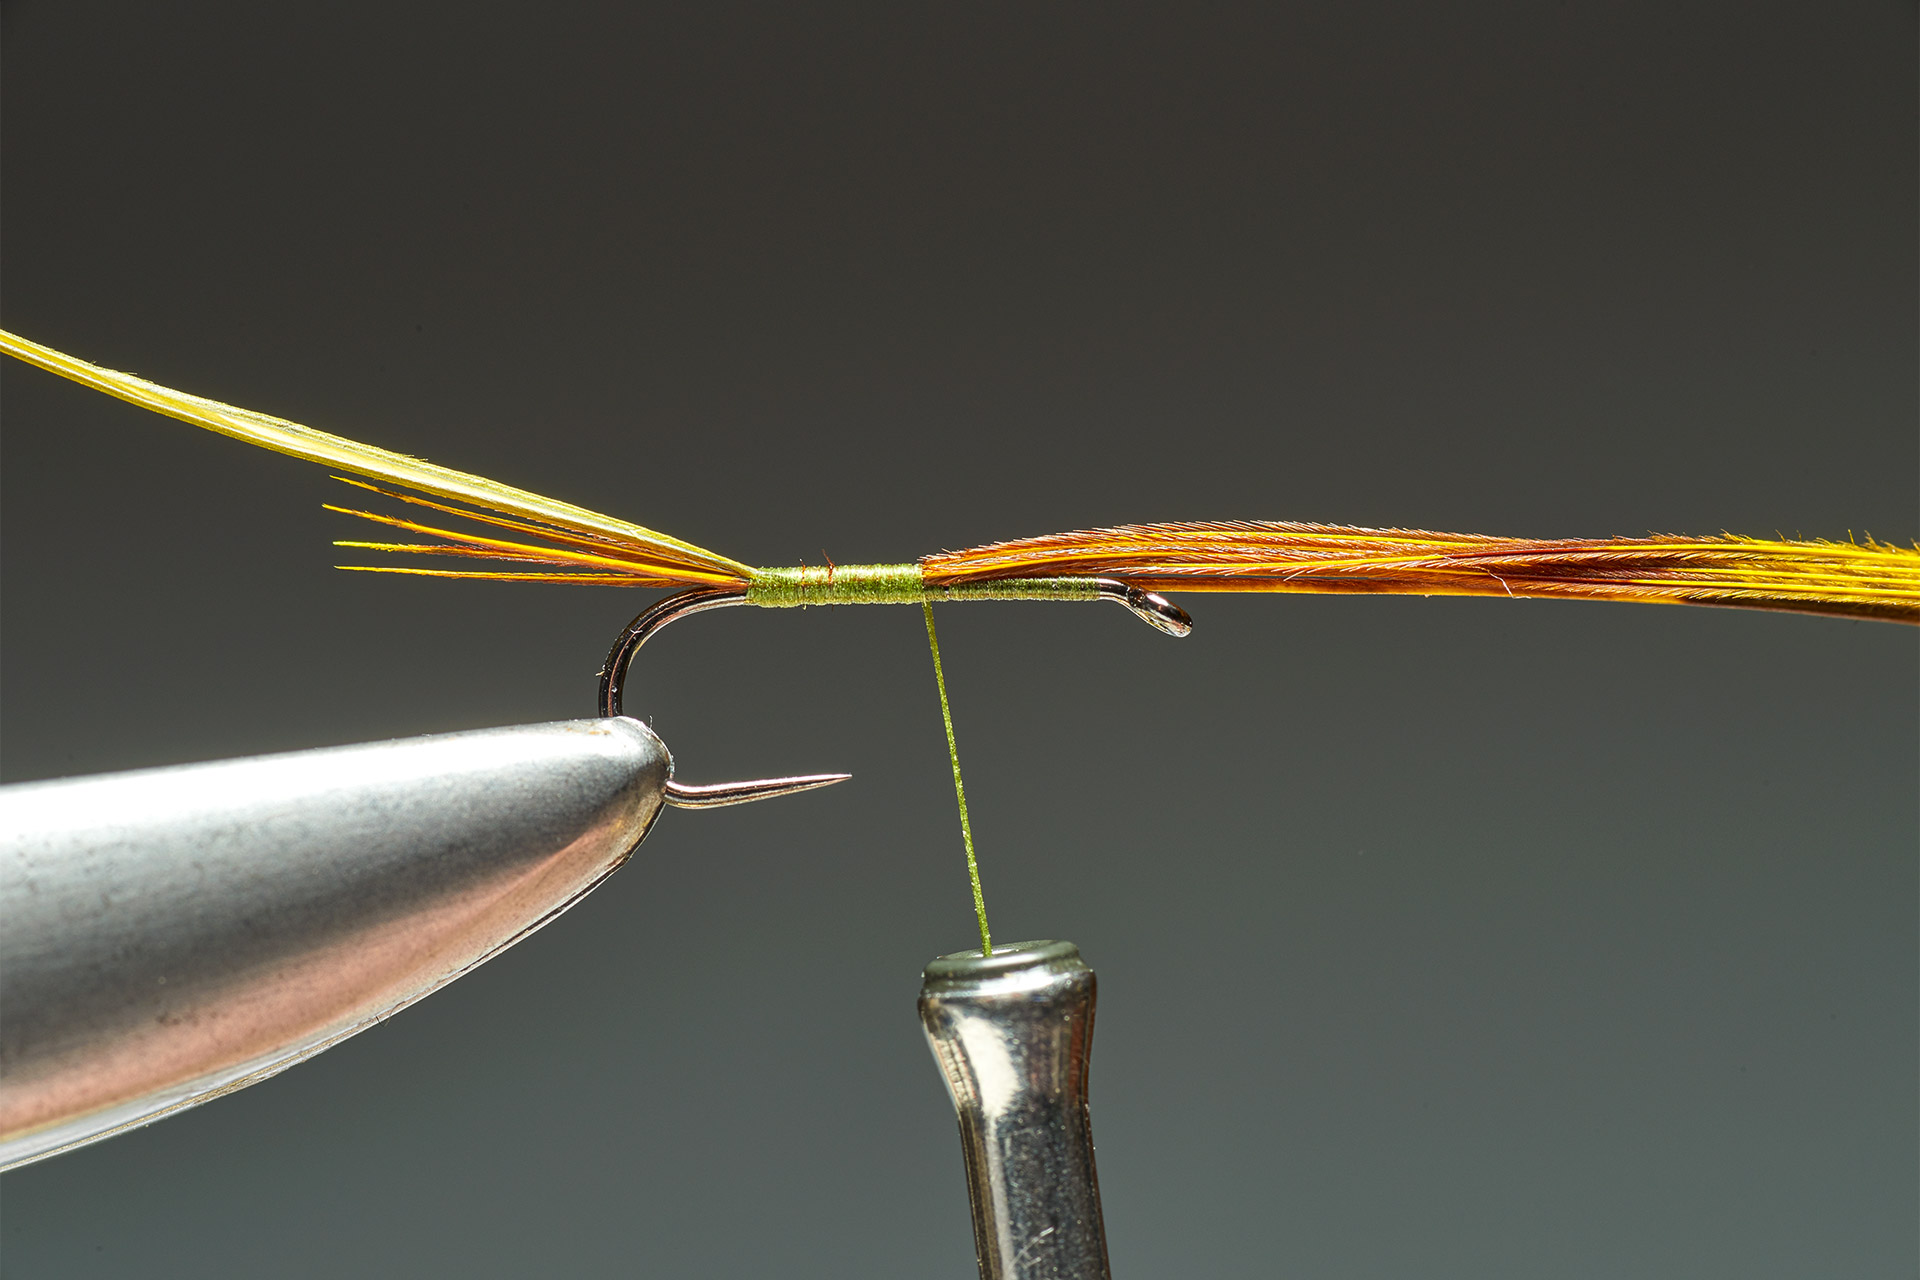 Step 3. Take touching turns of thread over the pheasant tail fibres to fix them securely to the top of the shank. Do not trim off the fibres at this stage.
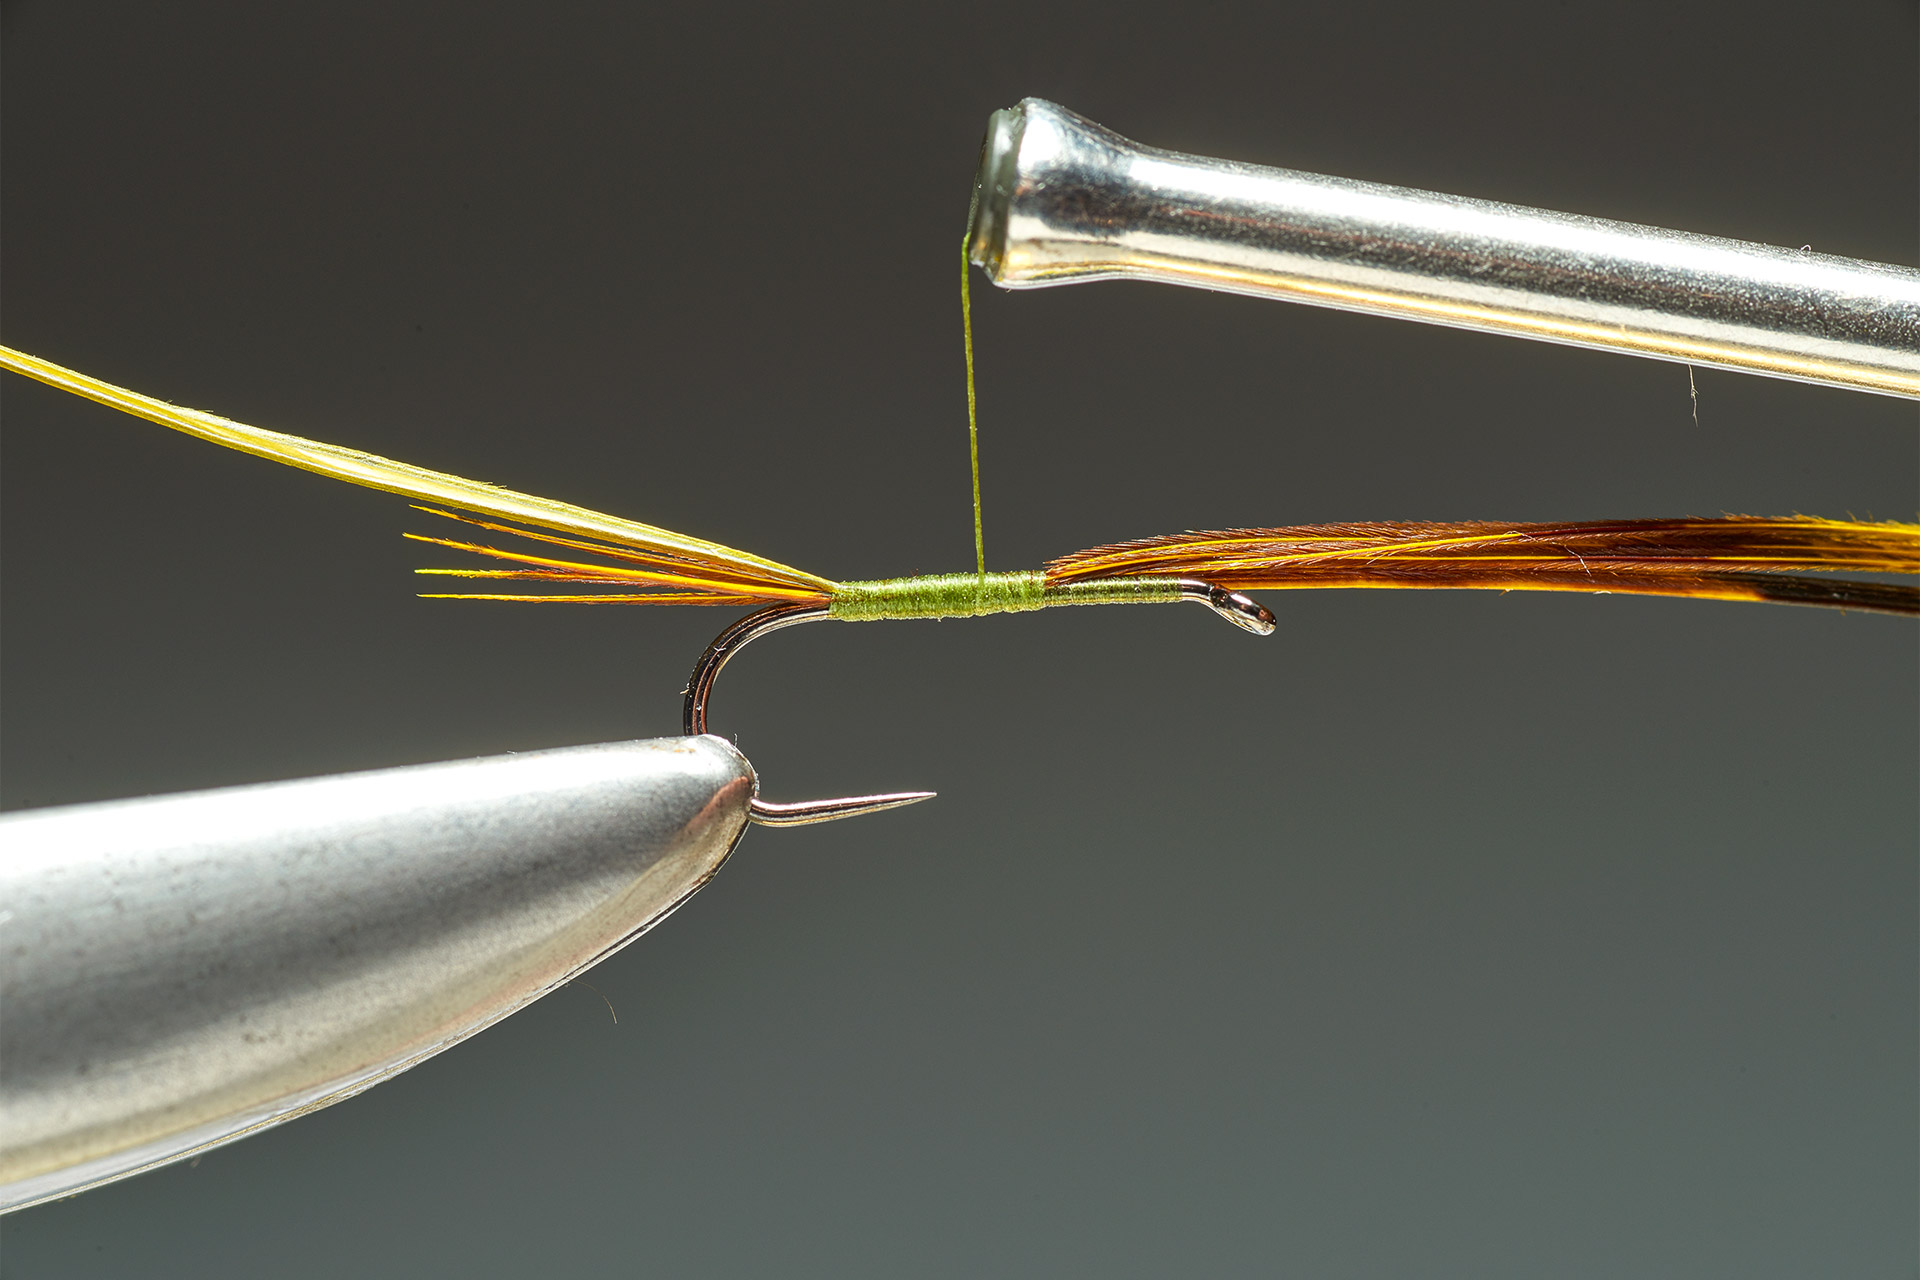 Step 4. Once the thread has reached halfway back to the eye, wind it back and forth to create a smooth, slightly tapered base for the biot body.
 Step 5. Grasp the base of the biot using a pair of hackle pliers. Wind the biot in touching turns, ensuring that the frill of tiny fibres are not trapped.
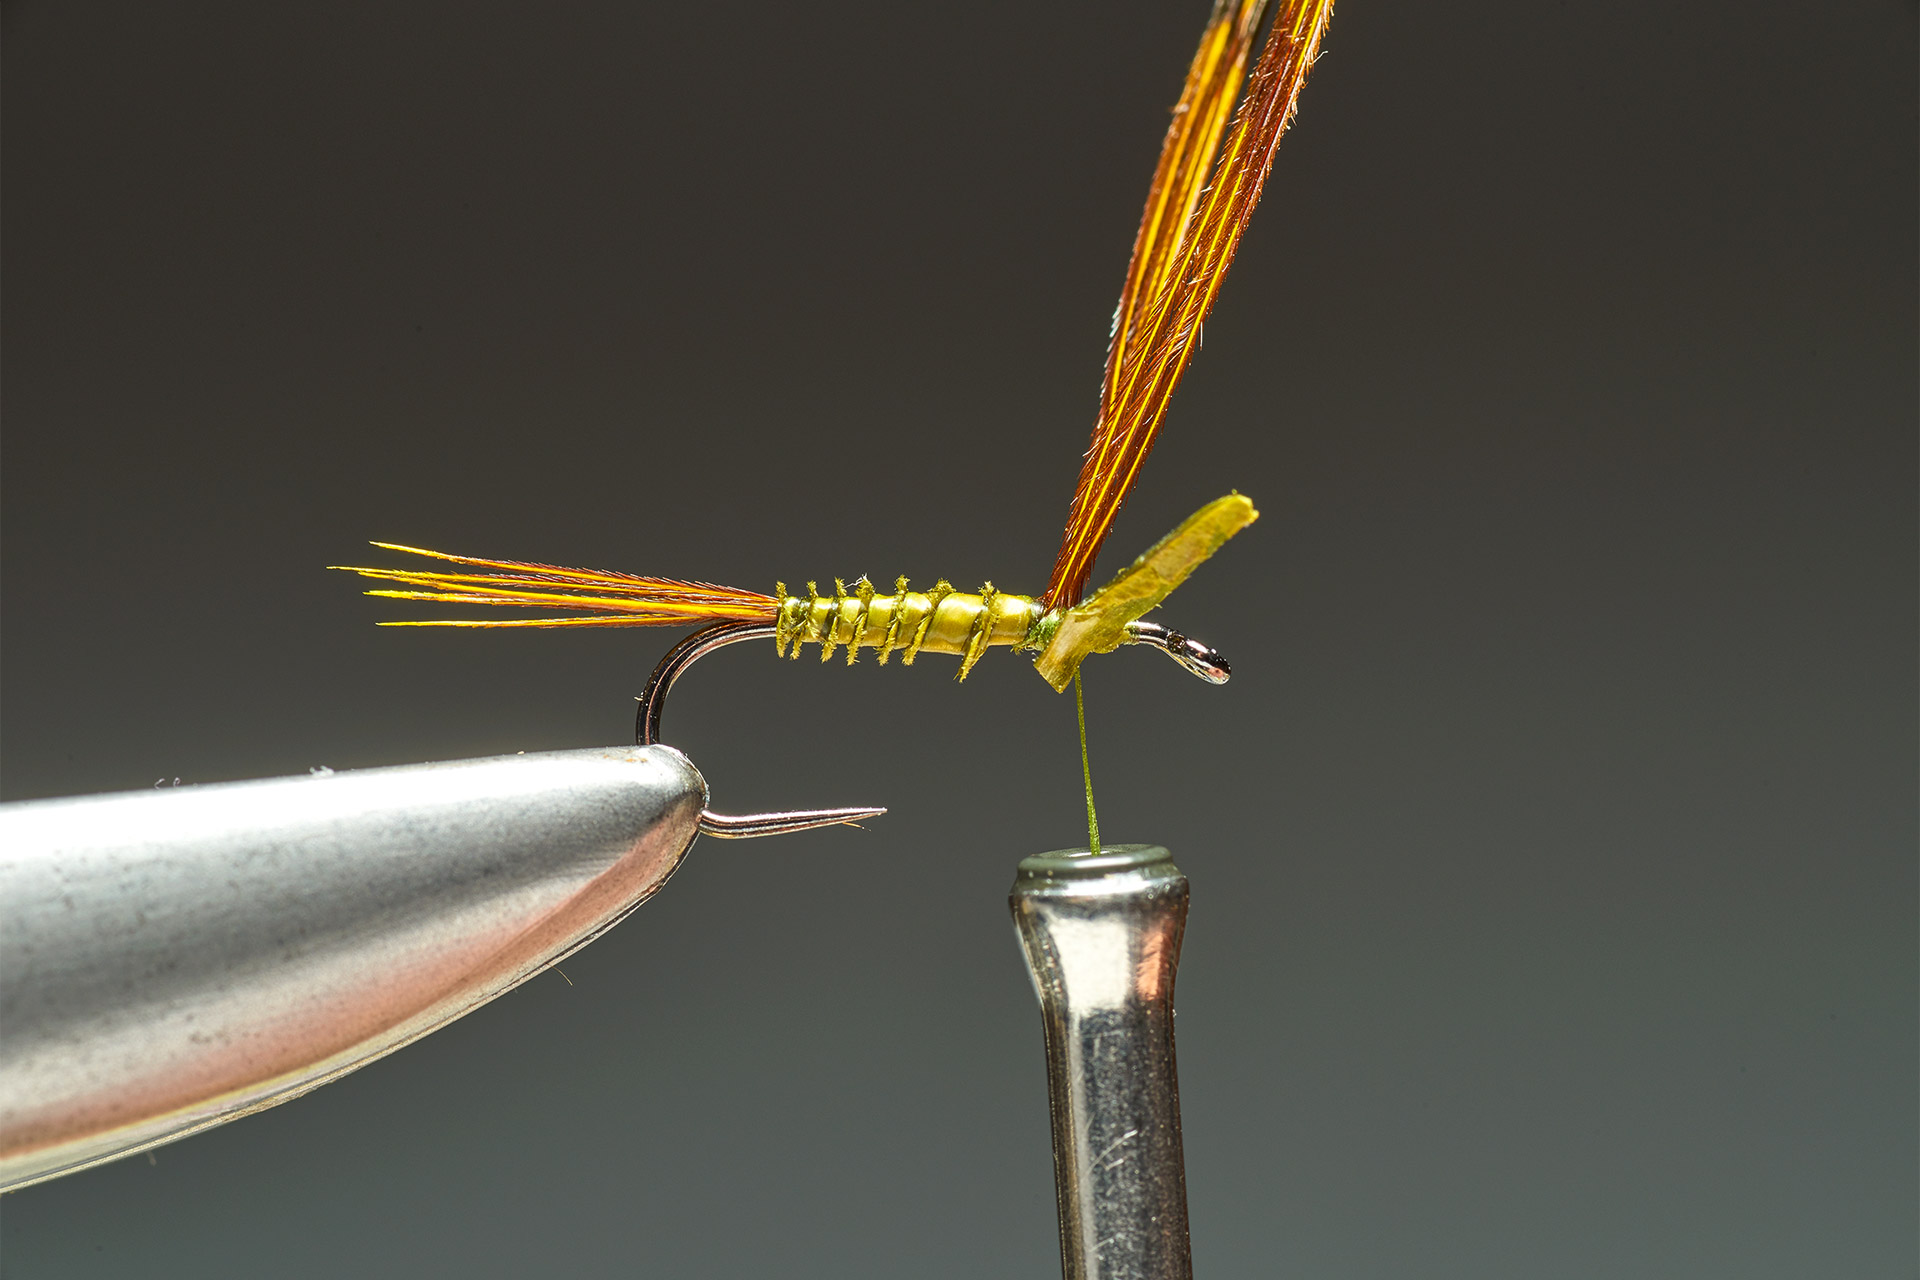 Step 6. Carry on winding the biot until it has covered the entire thread base. With the body in place, secure the loose end of the biot with thread.
 Step 7. Trim away the biot’s surplus, then take a pinch of hare’s fur and apply it to the thread. Fold the pheasant tail fibres back so that they point to the rear.
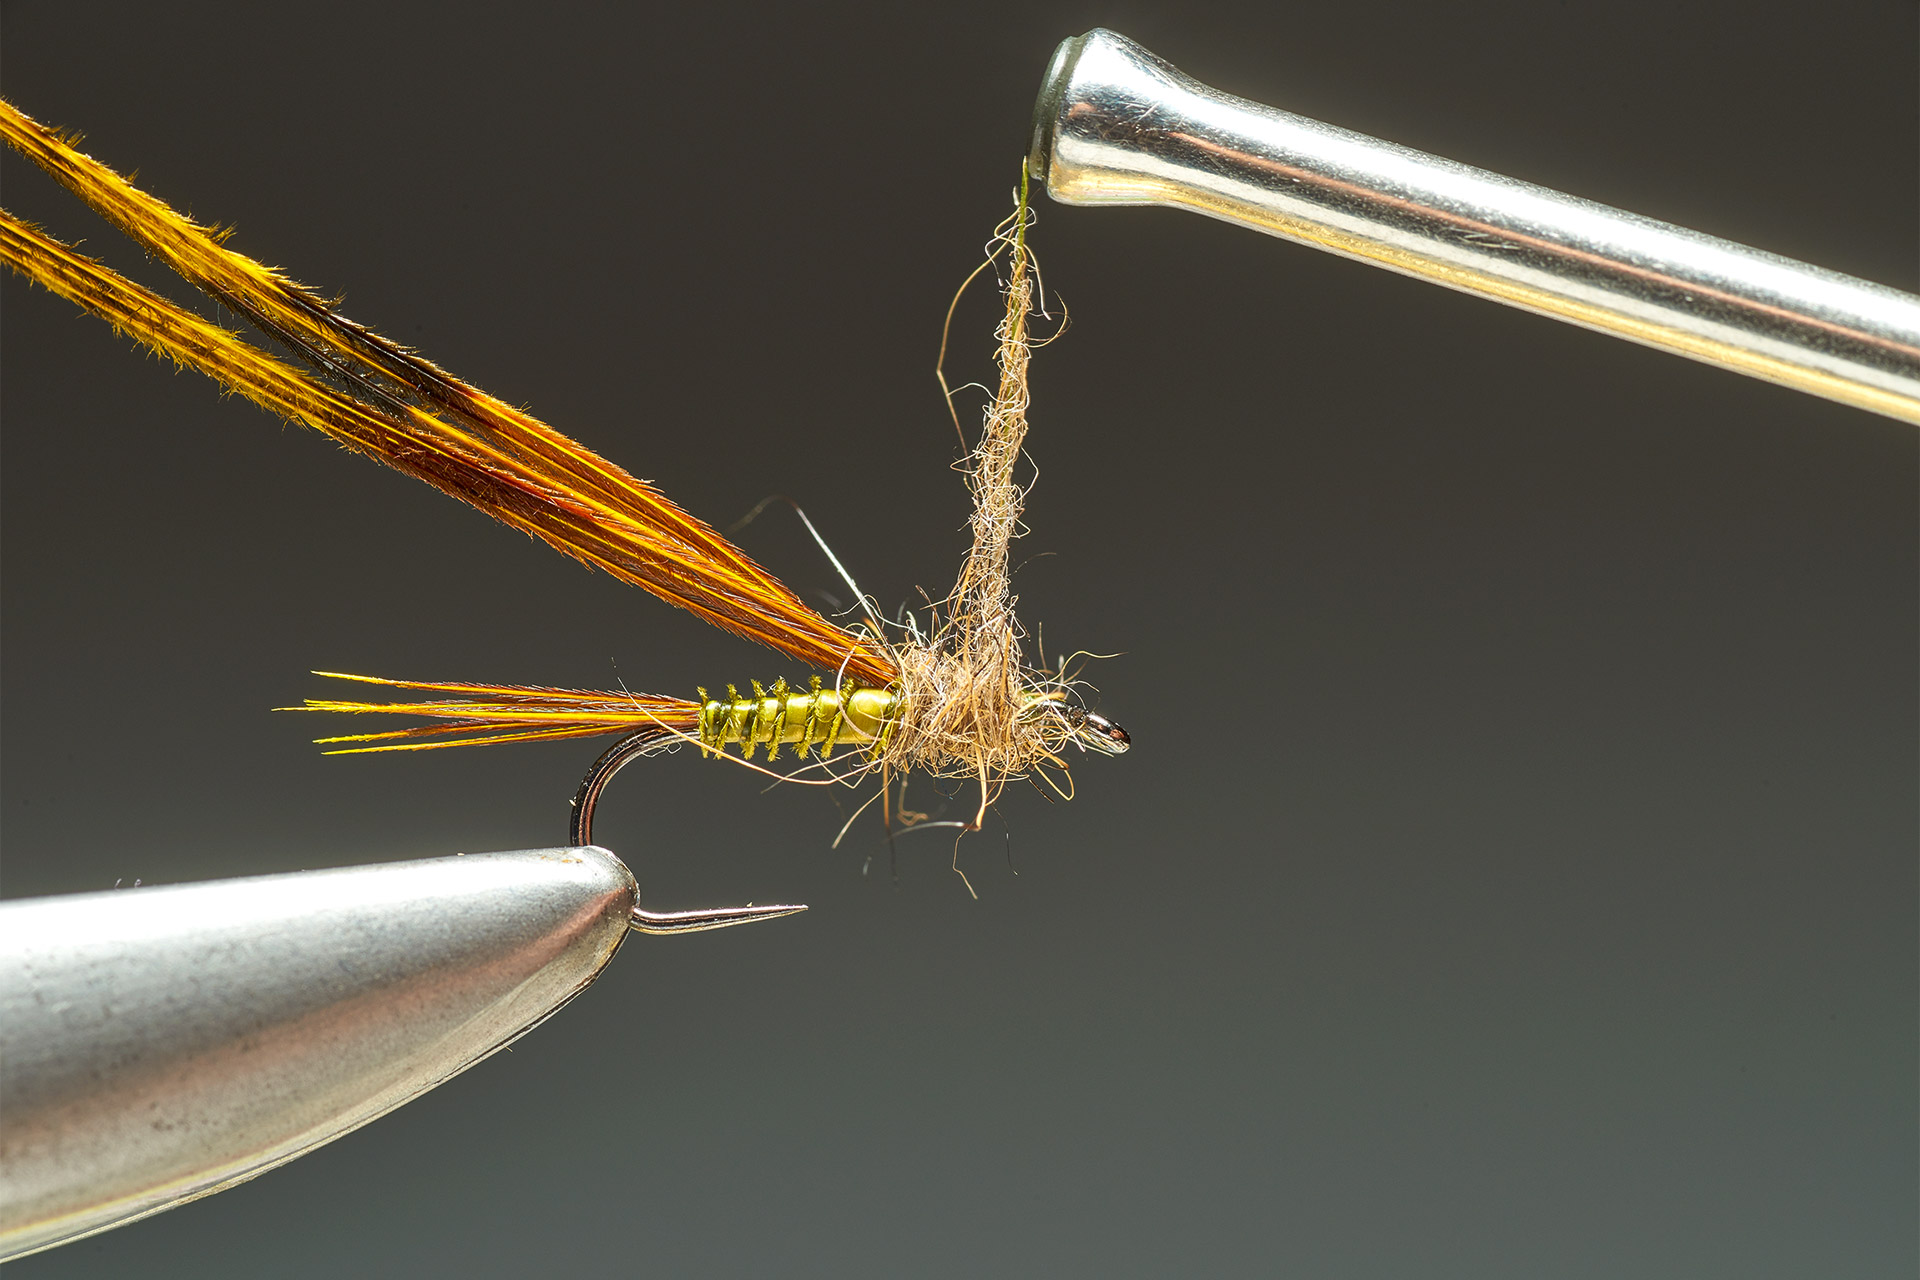 Step 8. Form a thin rope with the dubbing and wind towards the eye to create the thorax, leaving sufficient space at the eye to finish off.
 Step 9. Draw the pheasant tail fibres over the thorax and secure. Lift the fibres away from the eye and make two more thread-turns directly onto the hook.
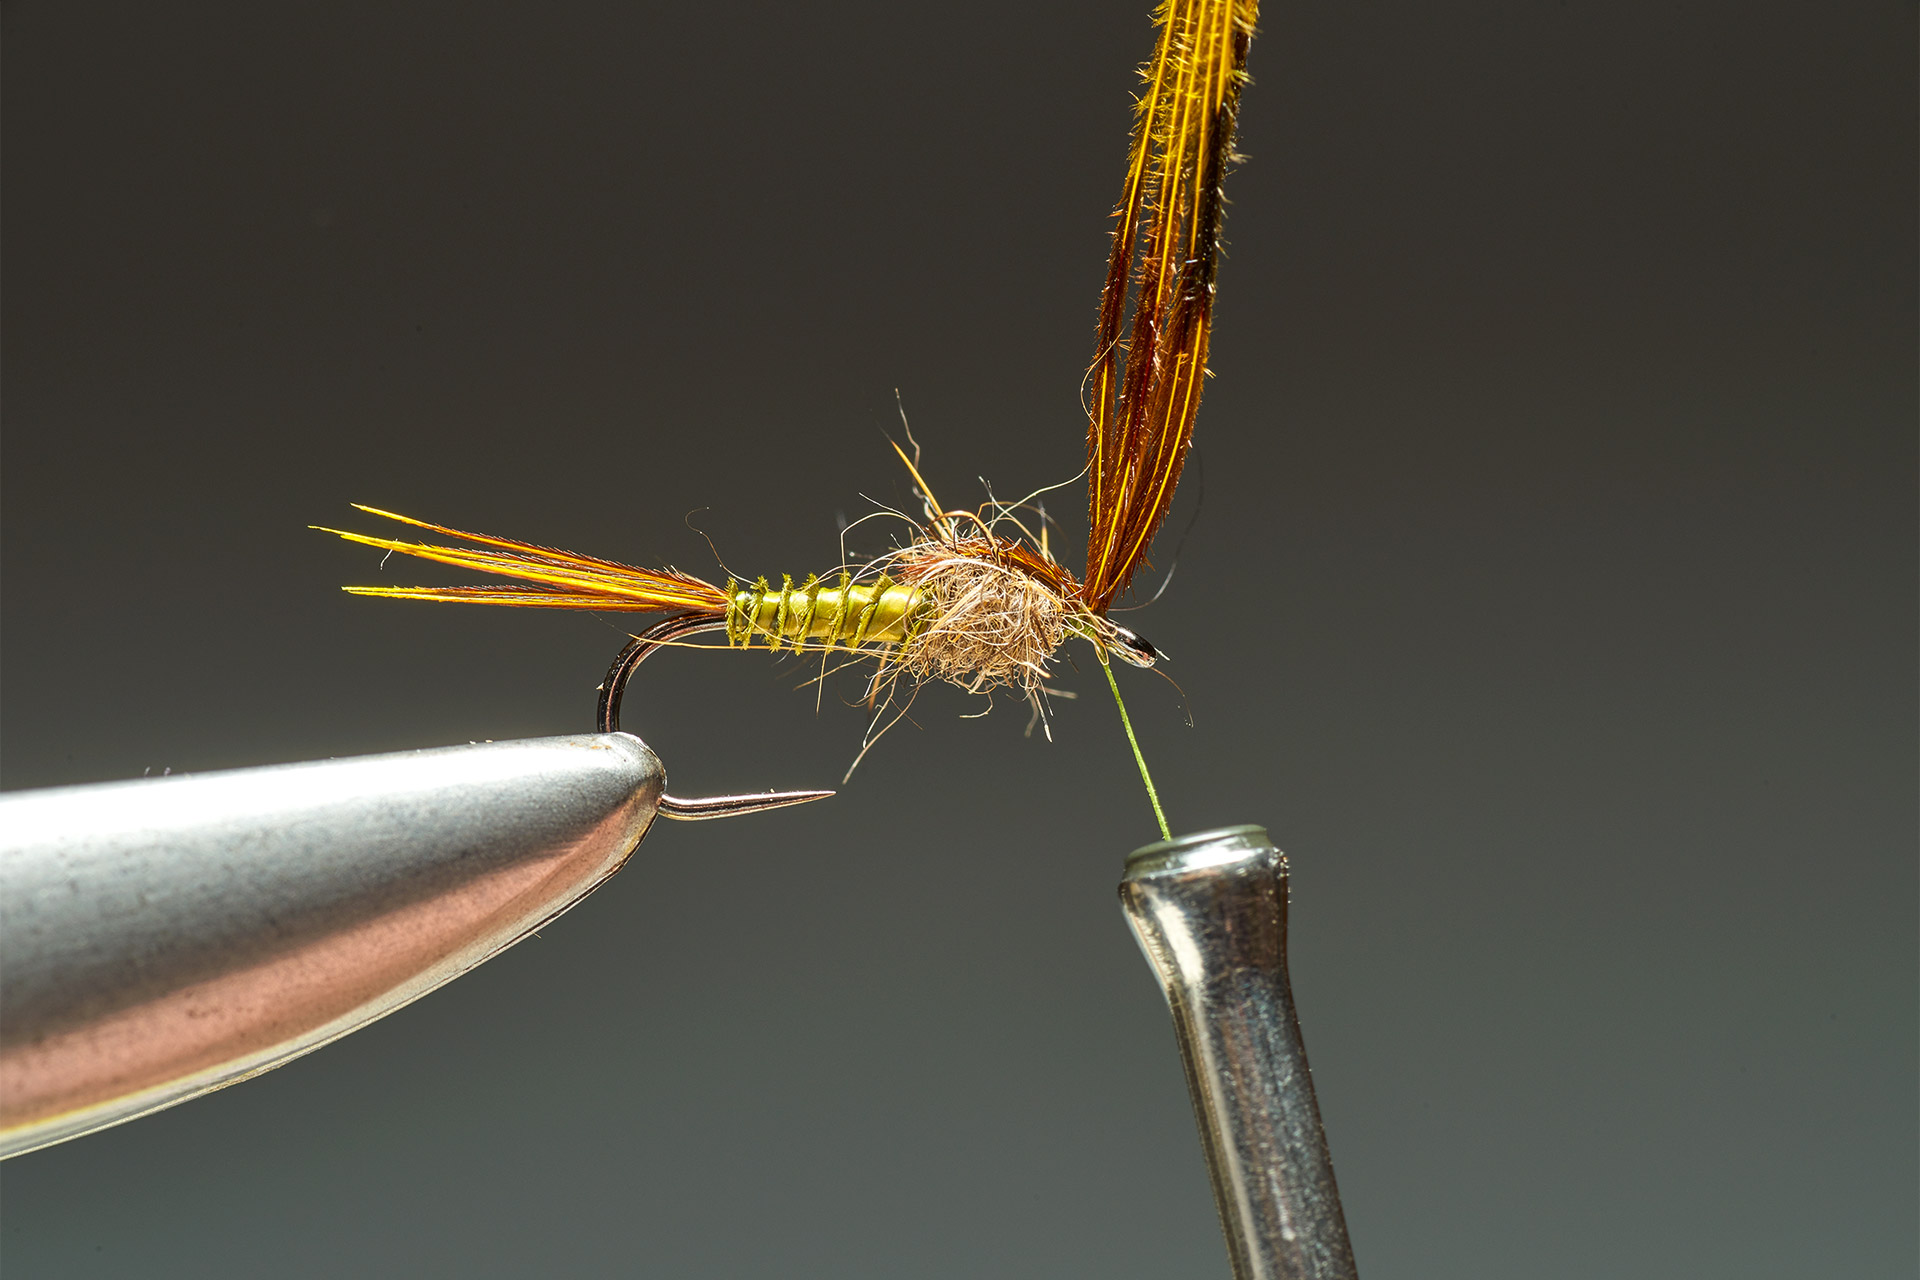
 Step 10. Pull the fibres back down, adding another two thread-turns to secure. Trim off the surplus fibres and cast off with a whip finish.